Tag: puzzle strategy

  • Pattern Recognition Techniques Every Puzzle Solver Should Know

    Pattern Recognition Techniques Every Puzzle Solver Should Know

    Pattern recognition is the quiet muscle behind faster, more confident puzzle solving. Whether you prefer word ladders, logic grids, nonograms, or browser-based brainteasers, the same small set of visual and logical habits will pay dividends. This article lays out core techniques you can apply immediately, with short drills to build them into your solving routine.

    Why pattern recognition matters

    At its simplest, pattern recognition turns clutter into a few reliable cues. Instead of trying every possibility, you learn to notice repeating shapes, forced placements, symmetry, and contradictions. Those cues reduce the search space, reveal leverage points, and let you plan two or three moves ahead without exhaustive trial and error.

    Key techniques and how to practice them

    1. Symmetry spotting

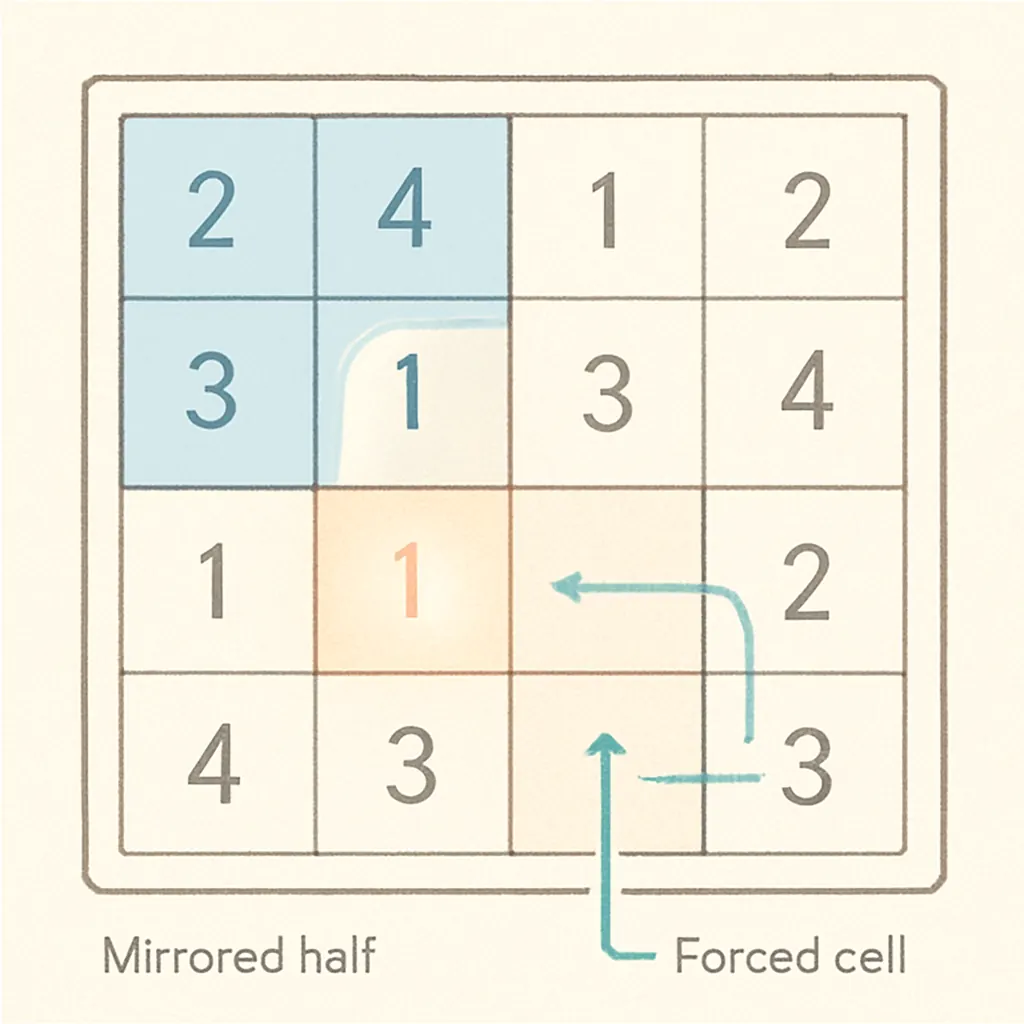
    Many puzzles either include explicit symmetry (a grid that’s mirrored) or implicit symmetry created by identical constraints. Symmetry often means that a finding on one side transfers to the other, or that a single ambiguity will resolve symmetrically.

    • How to use it: Before you make a move, scan for mirrored regions or repeating rows/columns. Ask: if I place X here, does an equivalent placement exist elsewhere?
    • Quick drill: Take small 10×10 nonograms or picture logic puzzles and cover the right half. Solve the left half first, then uncover the right and compare. Practice predicting placements based on mirrored clues. This builds an instinct for when symmetry will carry through.

    2. Forced-move detection

    A forced move is a placement or elimination that follows from the rules with no alternative. Recognizing forced moves early prevents wasted guessing and creates chains that simplify the puzzle.

    • How to use it: Look for cells or options that would violate a rule if left open. In a word puzzle, a letter that would block all possible words is forced; in a logic grid, a relationship that removes every alternative is forced.
    • Quick drill: Pick five logic-grid-style clues and try to find every deduction that’s absolutely forced before you make any tentative assumptions. A good use-case for this technique is in logic grid deduction patterns, where forced assignments cascade rapidly.

    3. Constraint propagation

    Constraint propagation is the practice of tracking how one placement narrows possibilities elsewhere and applying those restrictions repeatedly until nothing new appears. It turns local observations into global progress.

    • How to use it: After making a placement, update related rows, columns, or variables immediately. Re-evaluate constraints until the puzzle reaches a steady state.
    • Quick drill: On a medium nonogram (or a similar grid puzzle), place one obvious block and then list every cell whose state must change as a result. Repeat until no cells change. For a step-by-step approach, see nonogram solving steps.

    4. Chunking and template matching

    Chunking is recognizing common subpatterns—short sequences of filled and empty cells, typical letter clusters, or recurring shape motifs. Template matching is comparing the local area to a known pattern and applying the known consequences.

    • How to use it: Build a mental library of small patterns (e.g., a 3-cell run with two definite fills and one uncertain cell) and the consequences they imply. When you see that shape, apply the learned result instead of re-deriving it.
    • Quick drill: Save a screenshot of five small patterns you encounter in puzzles and write the rule that made each decisive. Review the list weekly to make those templates second nature.

    5. Edge and boundary reasoning

    Edges are powerful because they have fewer neighbors. Many puzzles force specific behavior at borders—filled runs must start or end near an edge, or certain letters must appear in corner positions of a grid.

    • How to use it: Check edges early. If a row or column has narrow space, start there; those constraints often yield clean starting placements.
    • Quick drill: In any grid puzzle, begin your solve by inspecting every border row and column and listing the immediate deductions you can make. Doing this for ten puzzles will show how often the edge contains the first useful move.

    Combining techniques: short workflow

    1. Scan for symmetry and repeating structures.
    2. Mark immediate forced moves (including edge consequences).
    3. Propagate constraints from every new placement until stable.
    4. Look for familiar chunks or templates to speed repetitive work.
    5. If progress stalls, re-scan for less obvious symmetries or chain reactions.

    This lightweight workflow is useful across many puzzle types. For example, nonograms reward early edge reasoning and constraint propagation; logic grids reward forced-move detection and template use for common deduction forms.

    Micro-practice plan (10 minutes a day)

    Consistency beats intensity. A short, focused daily routine will internalize these techniques far faster than infrequent marathon sessions.

    1. Minute 0–1: Quick scan. Open any puzzle and identify one symmetry, edge constraint, or obvious forced move.
    2. Minute 1–6: Focused work. Apply constraint propagation from that observation until you reach a natural pause.
    3. Minute 6–9: Template check. Ask whether any local shapes match templates you know. If none, note one new pattern to remember.
    4. Minute 9–10: Reflect. Jot a one-line note: what pattern helped, and what you’ll practice next time. A routine like this slots easily into a broader habit plan such as daily practice routines.

    Final tips for durable pattern sense

    • Keep a short pattern log. Over time you’ll notice which templates recur in your favorite puzzle types.
    • Use screenshots. Visual memory for small shapes is stronger when paired with an image you can review.
    • Mix puzzle types. Transferring a pattern from one genre (say, nonograms) to another (like certain grid logic puzzles) sharpens abstraction skills and prevents overfitting to one format.

    Pattern recognition is less about raw talent and more about deliberate exposure and repetition. Use the drills above, follow the short workflow, and you’ll find puzzles that used to feel slow become strikingly transparent. If you enjoy deduction-heavy puzzles, you may also like exploring specific deduction strategies in logic grid deduction patterns and step-by-step visual techniques in nonogram solving steps.
  • Solving Nonograms (Picross) — Step-by-Step Strategy for Beginners

    Solving Nonograms (Picross) — Step-by-Step Strategy for Beginners

    What a nonogram is — quick refresher

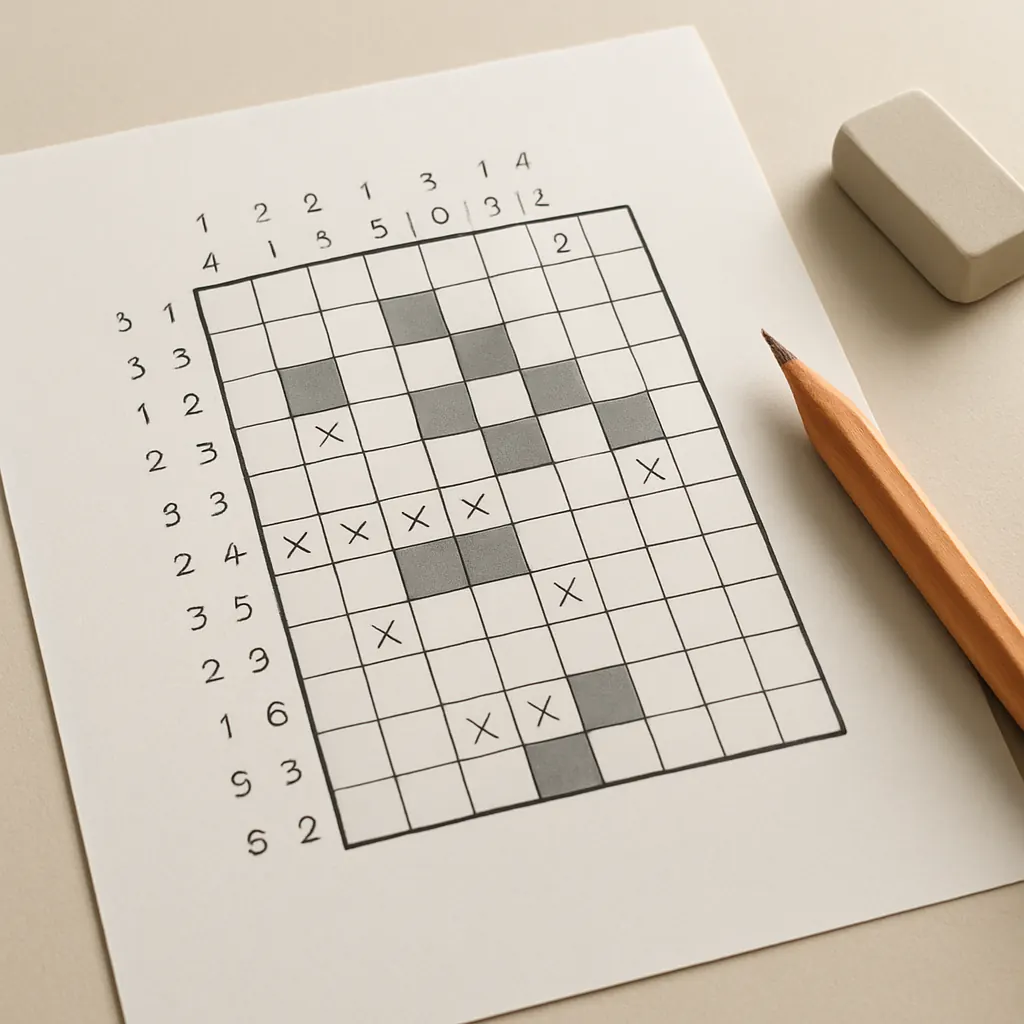
    Nonograms (also called Picross or Griddlers) are logic puzzles where each row and column has number clues that describe runs of filled cells. Your goal is to fill cells so every clue matches the blocks of filled squares in that line, with at least one empty cell separating blocks. A small set of simple rules plus consistent methods make these puzzles approachable and calm to solve.

    Tools and marks to use

    • Filled mark — a solid square or shaded cell to show a definite fill.
    • Empty mark — an X or light dot for cells you know must be blank.
    • Number tracking — cross off a clue when you’ve satisfied that run so you know what remains.

    Step-by-step solving method

    Think of nonogram solving as repeating a small set of reliable steps until the grid is complete. Move calmly and check each row and column as new information appears.

    1. Step 1 — Fill immediate certainties

      Look for rows or columns with a single clue equal to the entire length (e.g., “5” in a 5-cell row) or a clue of zero. Fill every cell when the clue fills the entire line, and mark all cells empty when a clue is zero.

    2. Step 2 — Use overlaps (the classic first move)

      When a run is longer than half the line, there are guaranteed overlapping cells. For example, in a 10-cell line with a clue of 7, the run can start as early as cell 1 and as late as cell 4. The overlap (cells 4–7) are therefore guaranteed filled. Mark those, then mark empties at the extremes where a run cannot reach.

    3. Step 3 — Cross-intersect rows and columns

      After filling or marking empties in one direction, check intersecting lines. A filled cell in a row reduces possibilities in its column and vice versa. Use this intersection repeatedly — it’s the engine of most solutions.

    4. Step 4 — Place forced gaps

      Once part of a run is located, you often know that the cell next to it must be empty, because runs require separation. Place an X immediately after a confirmed block when necessary to prevent runs from merging incorrectly.

    5. Step 5 — Use small-clue deductions

      Short clues like 1 or 2 can create predictable patterns: isolated clues of 1 often go between empties, and a separated pair like “2, 1” in a tight space can force placement. Think locally and test whether a tentative placement creates a contradiction in the intersecting line.

    6. Step 6 — Iterate and re-evaluate

      After each change, re-scan the grid. New fills and empties often unlock further definite moves. Avoid guesses; prefer deductions that follow directly from the clues and marks.

    Short example — a 5×5 walkthrough

    Suppose a 5×5 puzzle has a top row clue of “3” and the grid is empty. A run of 3 in 5 cells can be positioned starting at cell 1, 2, or 3. The guaranteed overlap is cells 2–4, so shade them. Now check the corresponding columns — those filled cells reduce possibilities elsewhere and may create new overlaps.

    As you mark empties next to that run and cross-check column clues, you’ll often force other rows to place their runs in single locations. Keep alternating directions until the puzzle resolves.

    Common patterns and where they appear

    • Edge fills — clues that reach the grid edge often push the run to one side, creating predictable empties and overlaps.
    • Single-cell separators — occasionally a 1-clue sits between two larger clues; that central 1 will be isolated by empties on both sides.
    • Symmetric constraints — many puzzles use symmetry visually, but don’t rely on it. Let the clues force placements.

    If you want a short list of recurring visual patterns to recognize and speed up solving, read about general pattern-recognition techniques that apply across puzzle styles.

    Typical beginner mistakes

    • Guessing too early — avoid marking a cell filled unless you can deduce it logically. One wrong fill can mislead the whole grid.
    • Forgetting to cross off satisfied clues — leaving lines unmarked makes it harder to see what remains; cross off runs as you complete them.
    • Not updating both directions — every change in a row should prompt a column check and vice versa.
    • Misplaced separators — placing an empty where a separating empty is not guaranteed can break future deductions.

    Progressive exercises to build confidence

    1. Start with 5×5 or 10×10 puzzles that have many zeros and full-line clues to practice overlaps and edge fills.
    2. Move to mixed-clue puzzles where you must alternate rows and columns repeatedly; focus on cross-intersections rather than sweeping fills.
    3. Try medium-sized puzzles with several small runs (1s and 2s) to practice placing isolated blocks and forced gaps.
    4. Challenge yourself with larger 15×15 puzzles that demand patience and a disciplined marking habit.

    When you practice, keep a record of errors and the type of deduction that fixed them. That habit turns mistakes into learning — try using a puzzle journal template to log patterns, missteps, and timing.

    Cross-training: other deduction patterns

    Nonogram logic overlaps with other pencil-and-paper puzzles. If you enjoy systematic elimination and inference, you may find value in reading about complementary techniques such as logic grid puzzle deduction patterns. The approach to consistent marking and chaining deductions is similar and strengthens your general puzzle intuition.

    Final tips

    • Work steadily and review rows and columns after every change.
    • Use light marks for uncertain notes if you must hypothesize, but aim to convert them to definite marks quickly or erase them.
    • Keep solving sessions short and calm—nonograms reward steady, focused work rather than frantic guessing.

    With these steps, a few simple patterns, and steady practice, you’ll find most beginner nonograms become predictable and enjoyable. Pace your practice with progressive exercises and track your progress in a journal to see clear improvement over time.