Author: Autor

  • Quiet Strategy: How to Break Tough Puzzles Without Stress

    Quiet Strategy: How to Break Tough Puzzles Without Stress

    Why calm matters more than speed

    Tension rarely helps a stuck puzzle. When you feel urgency or frustration, attention narrows and mistakes increase. The aim of this playbook is not to force a solution faster, but to change how you approach a block so progress becomes likely and enjoyable again. Use these steps as a short, repeatable routine whenever you find yourself circling the same dead ends.

    Quick calming steps (1–3 minutes)

    1. Stop and breathe: close your eyes for one minute and breathe slowly. This removes the immediate spike of emotion and resets focus.
    2. Switch posture: stand or stretch for 30 seconds. Changing physical state often changes mental state.
    3. Set a tiny goal: promise yourself one micro-action: read one constraint, test one hypothesis, or mark one small area of the puzzle. Tiny goals reduce pressure.

    Read the puzzle again a different way

    When stuck, the surface reading of the puzzle can blind you to useful structure. Try one of these short re-reads:

    • Reverse read: start from the last step or the final constraint and read backwards. This can reveal consequences you missed.
    • Read for negatives: scan for what is not allowed. Noticing exclusions often frees up space for new deductions.
    • Summarize aloud: explain the current facts out loud in one sentence. The act of verbalizing clarifies assumptions.

    Do one micro-test

    A micro-test is a tiny experiment that costs almost nothing but provides definite information. Think of it like dipping a toe in the water before committing.

    1. Pick a single cell, line, or variable you aren’t sure about.
    2. Assume one option for that item and follow only immediate, forced consequences (no long hypotheticals).
    3. If you reach a quick contradiction, mark that option as impossible; if not, record the consequences and step back.

    Micro-tests are low-arousal because they avoid wandering into deep hypotheticals. They give clear yes/no feedback fast, which reduces uncertainty and builds forward motion.

    Use notation to simplify the complex

    When puzzles have many interlocking constraints, a small change in how you notate information can make chains of logic visible. Consider shorthand marks, tiny diagrams, or a separate column for “hard facts” vs. “soft possibilities.” If you want concrete notation ideas that help when you’re stuck, try this guide: notation for breaking hard puzzles.

    Structured backtracking: track branches without going crazy

    Uncontrolled backtracking is exhausting. Use a tidy method so you can explore alternatives without losing the work you’ve done.

    1. Label your checkpoints: give a short note to the puzzle state before you try a risky assumption (example: “A: assume X at cell 5”).
    2. Limit depth: allow only one or two levels of assumption at a time. If you need more depth, it’s likely time to pause and review instead.
    3. Keep a one-line log: on scrap paper, record the assumption and the decisive result (contradiction, partial progress, or no effect). This stops you repeating the same failed branch later.

    Micro-session routine for a stuck puzzle (5–12 minutes)

    1. Pause, breathe, one physical stretch (1–2 minutes).
    2. Quick re-read of the last three deductions you made (1–2 minutes).
    3. Choose one micro-test and run it to conclusion (2–4 minutes).
    4. If no result, take a 2-minute break and either switch to another small puzzle or use a reset routine. If you want ideas for timed micro-resets, see: use short resets to overcome blocks.

    When to ask for calm help

    Getting another person involved can be very effective, but keep it low-competition. A good cooperative prompt is: “I’m stuck at this fact; can you read the last three clues and tell me if you see a consequence I missed?” This frames the interaction as mutual discovery rather than a test. For approaches that keep collaboration gentle and constructive, review these cooperative solving techniques.

    Small habits that prevent long blocks

    • Work in short chunks: 12–25 minute sessions keep focus sharp and make backtracking less costly.
    • Record forced moves: when a deduction is forced, mark it clearly so you don’t question it later.
    • Review mistakes calmly: when you do hit a contradiction, treat it as information: what assumption led there, and how will you mark that off in future?

    Final note: be curious, not desperate

    The quiet approach is about curiosity and small experiments, not brute force. Each micro-test, careful notation change, and brief reset reduces the mystery a bit. Over time these tiny wins build a habit of steady, relaxed progress. Use the routines here the next time you feel stuck; aim for slow, visible improvement rather than immediate victory.

    Simple checklist before you proceed

    • Breathe and change posture.
    • Re-read for negatives and reverse consequences.
    • Run a single micro-test and log the result.
    • Use clear notation and label checkpoints.
    • If needed, try a calm cooperative read or a short reset.
  • Evaluating Puzzle Difficulty: A Simple Framework for Choosing Puzzles That Fit Your Mood

    Evaluating Puzzle Difficulty: A Simple Framework for Choosing Puzzles That Fit Your Mood

    Why pick difficulty deliberately?

    Not every puzzle deserves the same attention. Some days you want a calm few minutes of clarity; other days you want a deliberate stretch. Choosing the right difficulty for your moment preserves enjoyment and makes steady improvement easier. This article gives a compact, actionable framework you can use in under a minute.

    The four quick axes

    When you decide whether to open a puzzle, run it through four short questions. Treat each axis as a slider you set in your head.

    1. Time (how long can I spend?)

    Estimate available time in three buckets: under 10 minutes, 10–30 minutes, or 30+ minutes. If you have under 10 minutes, prefer puzzles labelled “bite-size” or with a single clear step. If you have 30+ minutes, you can accept multi-stage problems that reward planning.

    2. Complexity (number of independent elements)

    Complexity is about how many things you must track at once: a single word or grid cell vs. several interacting regions or rules. Low-complexity puzzles are easier to enter calmly; high-complexity puzzles need deliberate note-taking or a multi-stage plan.

    3. Frustration index (how likely am I to hit a block?)

    Estimate how often you expect to get stuck. A low frustration index means you’ll make steady progress; a high index means frequent dead-ends. If you’re in a relaxed mood, favor low-to-medium frustration. When you want a stretch, tolerate a higher index but keep a clear stopping rule (see routines below).

    4. Learning value (small predictable gains vs. big unpredictable ones)

    Ask whether the puzzle will reliably teach a repeatable technique in 10–20 minutes (high predictable learning) or whether its insights will be sporadic. For regular practice, prefer puzzles with clear, repeatable learning so small efforts compound.

    Quick heuristics for common moods

    Below are short settings for each mood. Use them as a checklist rather than absolute rules.

    • Calm play: Time under 15 minutes, low complexity, low frustration index, modest learning value. Example: short word puzzles, a single logic mini-grid.
    • Focused practice: Time 15–45 minutes, medium complexity, medium frustration, high predictable learning. Choose puzzles that emphasize a single technique you want to improve.
    • Mental stretch: Time 30+ minutes, high complexity, higher frustration tolerated, high but variable learning. Use when you want deeper problem-solving practice and have an open schedule.

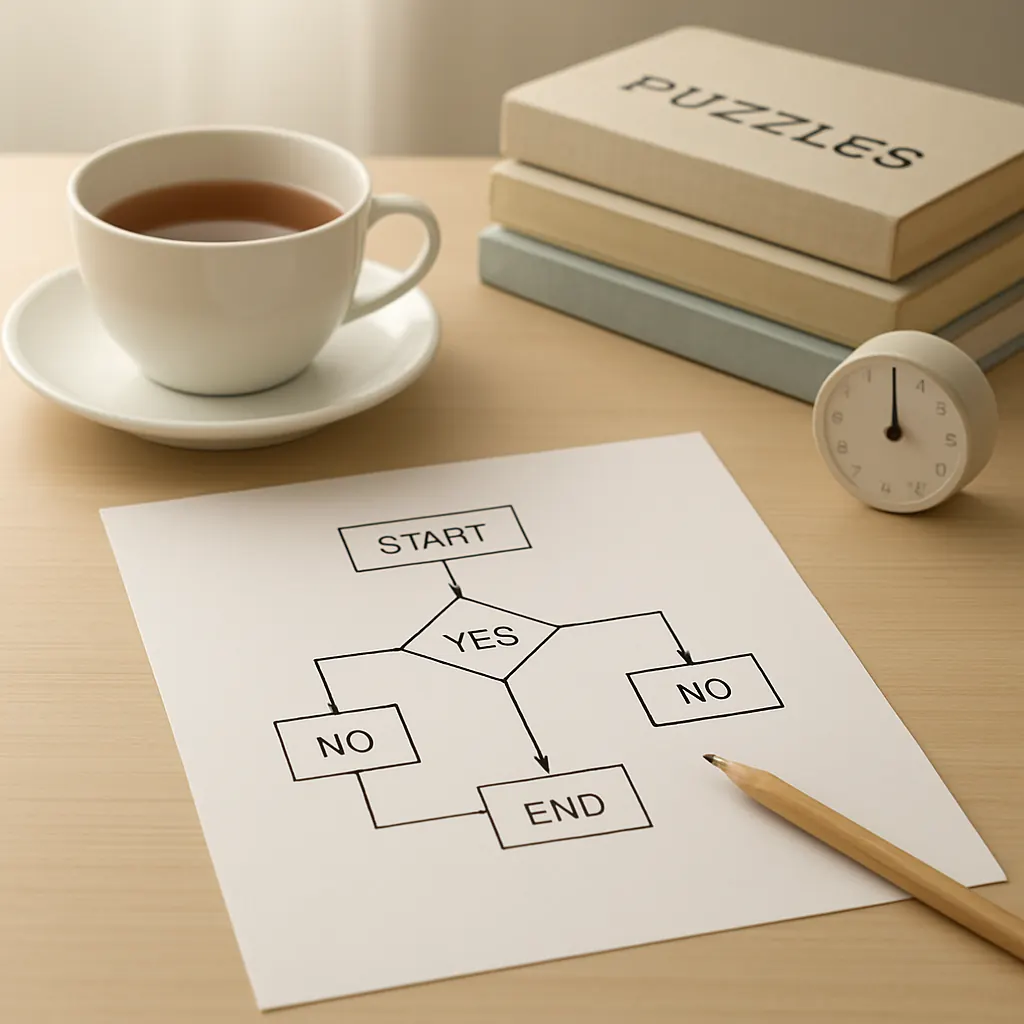
    A one-question printable flowchart

    Print this on a card or keep it on your phone. Ask the question and follow the one-step rule.

    Question: How much time do I have right now?

    1. If under 10 minutes → pick a puzzle with low complexity and low frustration. Stop after 10 minutes or when you feel calm.
    2. If 10–30 minutes → pick medium complexity with predictable learning. Allow one deliberate hint if stalled for 8–10 minutes, then decide to continue or stop.
    3. If 30+ minutes → pick higher complexity and set a checkpoint at 30 minutes to reassess frustration and learning value.

    This single question reduces decision fatigue: time bounds strongly predict which other axes you should tighten.

    Three tiny routines to keep play calm

    Use short routines rather than long rules. They’re easier to follow and build into daily life.

    • Two-step entry: 1) Scan puzzle rules and note constraints (1–2 minutes). 2) Try the simplest guaranteed move. If none, move to the next puzzle or add a single note for later.
    • Ten-minute checkpoint: When you start a longer puzzle, set a 10-minute timer. If you’re stuck at the checkpoint, either use one hint, switch to a lower-frustration segment, or stop and revisit later.
    • Daily micro-practice: Pick one technique to practice for 10–20 minutes three times a week. This keeps learning value high without burning out.

    When to switch and how to rescue a stalled session

    If you hit a block, adopt a calm rescue plan: pause, mark where you are, and try a different angle for five minutes. If the block persists, switch to a simpler puzzle or take a short break. For guidance on adapting strategy when difficulty and mood change, see when to switch strategies if stuck.

    Adjusting difficulty for accessibility

    Difficulty isn’t one-size-fits-all. Adjust for sensory, motor, or cognitive accessibility by changing time, layout, or rule presentation. Simple changes include larger fonts, more contrast, fewer simultaneous elements, or allowing written notes. For a quick checklist to apply before you start, see adjust for accessibility needs.

    Aligning with longer goals

    If you follow a week- or month-long plan, make sure each day’s puzzle fits the time and learning axis of that plan. For example, if a weekly goal emphasizes learning a pattern, pick puzzles with predictable learning on practice days and reserve the mental-stretch puzzles for weekend sessions. For more on connecting difficulty to longer challenges, see matching difficulty to weekly goals.

    Examples — three short pickers

    • Five-minute reset: A single mini-crossword or a 3×3 logic microgrid. Time under 10 minutes, low complexity, low frustration.
    • Targeted practice slot: 20 minutes solving puzzles that force one tactic (e.g., pattern elimination). Medium complexity, medium frustration, high predictable learning.
    • Weekend challenge: A long-format puzzle with multiple interacting rules; allow two checkpoints and an open timer. High complexity and variable frustration, suitable for mental stretch.

    Final note

    Puzzle difficulty is a tool, not a badge. Use this framework to pick puzzles that match your time, energy, and goal for the session. Keep the one-question flowchart handy, use the short routines above, and adjust tools for accessibility so play stays calm and steady. Over weeks, this small habit of matching difficulty to mood will make play more rewarding and progress more reliable.

  • Browser Extensions and Tools That Make Puzzle Solving Easier

    Browser Extensions and Tools That Make Puzzle Solving Easier

    Why small tools help more than big automation

    Puzzle players often want a little nudge — cleaner screenshots, a stable timer, or a neat way to capture a thought — without turning the solving process into a shortcut. The sweet spot is small, low-friction tools that reduce friction (capturing, annotating, keeping notes) while keeping the core challenge intact. Below I list extensions and tiny web apps I use for calm, steady solving with an eye on privacy, accessibility, and low distraction.

    Design principles for choosing tools

    • Minimal permissions: Prefer extensions that ask only for what they need. If an extension wants access to all your browsing data, consider alternatives.
    • Low distraction: Disable automatic updates, notifications, or in-app feeds. Tools that sit quietly in the toolbar are ideal.
    • Accessibility: Look for adjustable fonts, color contrast options, and keyboard shortcuts so tools help everyone solve comfortably.
    • Local-first data: If your notes are private, choose apps or templates that store locally or let you export easily for backups.

    Essential browser extensions and what to use them for

    Grid overlays and rulers

    When working on logic grids or hidden-picture puzzles, a simple on-screen grid overlay speeds visual alignment and prevents counting mistakes. Search for lightweight extensions called Grid Overlay or Page Ruler Redux. Key tips:

    • Pick overlays with adjustable opacity and grid spacing so the underlying puzzle remains readable.
    • Use the toggle shortcut; don’t leave overlays active by default.

    Screenshot and annotation

    Quickly capturing a state and annotating it is often more efficient than copying text. Try a screenshot tool that supports in-browser cropping and arrow/text annotations (examples: Lightshot, Nimbus). When annotating, adopt a consistent colour scheme: one colour for hypotheses, another for confirmed facts.

    Timers and focus helpers

    Built-in timers, simple countdowns, or Pomodoro extensions help you practice timed solving without turning sessions into a race. Choose timers that show remaining time in the toolbar and optionally vibrate or flash when finished. For a calm practice, try 25–40 minute focus segments with a 5–10 minute review break.

    Contrast, fonts and readability

    Extensions like Dark Reader or font-size controllers make puzzles easier to read in low-light or high-contrast situations. Use them sparingly: the goal is clarity, not changing puzzle aesthetics. Increase line-height or enable dyslexia-friendly fonts when you notice visual fatigue.

    Clipboard and quick snippets

    Small utilities that keep a history of your clipboard or let you save short snippets of text are useful for jotting repeated candidate names, coordinates, or common notations. Look for clipboard manager extensions that encrypt local data if you paste sensitive content.

    Lightweight web apps and templates

    Web apps can complement extensions: simple timers, whiteboards, and note pads that avoid social features. For journaling after a session I use a two-part structure: a fast summary and a short action note. If you want ready-made options, try the downloadable journal templates that emphasize five lines: date, puzzle type, time spent, one thing learned, one exercise for next time.

    For notation and small grids, a handful of tiny HTML tools let you draw or export compact grids. These are helpful when you rely on specific shorthand — if you use the notation patterns I describe elsewhere, consider tools that implement or support those approaches: notation helpers and templates.

    Tools for cooperative and multiplayer sessions

    Cooperative solving benefits from shared canvases and low-latency screen sharing. Simple shared whiteboards (Google Jamboard, Miro, or open web whiteboards) let people sketch the same grid and add sticky notes. For privacy-focused meetups, services like Jitsi provide browser-based screen sharing without installing a large app. If you meet with friends, check out extensions that aid cooperative play to streamline passing notes, syncing timers, and marking progress.

    Quick workflows: three calm setups

    1. Solo practice (30–40 minutes)

      • Open puzzle in browser, enable grid overlay only when you need it.
      • Start a 35-minute focus timer in the toolbar.
      • Use screenshot + annotation to capture the puzzle state before attempting difficult steps.
      • Write a one-paragraph entry into your journal template during the 5-minute break.
    2. Short review session (10–15 minutes)

      • Open your last journal entry and copy the single exercise you planned.
      • Set a 12-minute timer and work on that focused exercise; annotate when you discover an insight.
    3. Co-op puzzle night (60–90 minutes)

      • Start a shared whiteboard and a single shared timer so everyone follows the same rhythm.
      • Assign one person to capture annotated screenshots and another to transcribe final notes into the journal template.

    Privacy and maintenance checklist

    • Review extension permissions before installing and revisit them quarterly.
    • Prefer extensions with a clear privacy policy or open-source code if you care about transparency.
    • Regularly export your journal and snippets so you control your data.
    • Turn off non-essential notifications and automatic updates during solving sessions to reduce distraction.

    Final note: tools to support practice, not replace it

    The right extensions and tiny apps keep the solving flow smooth: a clean screenshot, a quiet timer, a readable font, and a minimal journal entry. Use tools to lower friction, then step back to let the puzzle itself do the work. If you keep a compact routine — a focused session, an annotation habit, and a short journal note — you’ll find steady progress without losing the quiet pleasure of solving.

  • Curated Monthly Puzzle Challenge: A 4-Week Plan for Relaxed Skill Growth

    Curated Monthly Puzzle Challenge: A 4-Week Plan for Relaxed Skill Growth

    Why a month, and why gentle?

    A single month is long enough to build a habit but short enough to keep focus. This plan avoids burnout by privileging consistency over intensity: you’ll use small, repeatable practice units and a clear theme for each week so progress feels tangible without pressure. The core idea is steady exposure, varied but guided practice, and short reflection to steer improvement.

    How the challenge is structured

    Each week has a single theme: speed, pattern spotting, notation, and mixed practice. Days are built around micro-tasks that take 10–20 minutes, with one optional stretch day for a longer puzzle. The challenge uses short daily sessions as the practice engine—simple, repeatable chunks that lower friction and make it easy to keep going.

    Daily format (10–20 minutes)

    • Warm-up (2–4 minutes): A quick, low-stakes puzzle to engage attention—use the weekly warm-up routines before higher-focus work.
    • Core micro-task (7–12 minutes): The day’s targeted exercise (see weekly outline).
    • Reflection (1–3 minutes): Note one thing that worked and one tweak for tomorrow in your log.

    Week-by-week plan

    Week 1 — Speed and comfortable pacing

    Goal: reduce hesitation and learn a relaxed tempo. This week trains familiarity and calm execution rather than raw speed.

    1. Day 1–2: Timed micro-puzzles — pick a familiar puzzle type and do three in a single sitting with a gentle timer (8–12 minutes). Focus on steady breathing and consistent pace.
    2. Day 3–4: One deeper puzzle — allow 15–20 minutes; practice pausing, scanning, then executing each step deliberately.
    3. Day 5: Speed drill with reflection — three rapid rounds and note which step took longest.
    4. Day 6: Warm, un-timed play — enjoy a puzzle without a clock to prevent anxiety.
    5. Day 7: Optional longer puzzle (20–40 minutes) or rest.

    Week 2 — Pattern spotting

    Goal: increase recognition of recurring shapes, motifs, or logical structures that reappear across puzzles.

    1. Day 1–2: Focused examples — solve two puzzles emphasizing a particular pattern (e.g., symmetrical placements, recurring word roots, anchor clues).
    2. Day 3–4: Comparison drills — do similar puzzles back-to-back and list the repeated features in your log.
    3. Day 5: Pattern scavenger — try to find three small repeating elements inside a single puzzle.
    4. Day 6: Free exploration — play casually and underline common substructures you notice.
    5. Day 7: Optional review puzzle to consolidate recognition skills.

    Week 3 — Notation and clearer thinking

    Goal: refine how you mark puzzles so that your notes increase clarity instead of creating clutter.

    1. Day 1: Choose a minimal set of symbols or shorthand you’ll use for the week (e.g., small circles, crosses, letters).
    2. Day 2–3: Apply the system to short puzzles and then evaluate which marks helped and which confused you.
    3. Day 4: Try a reduction exercise — solve a puzzle using the fewest marks possible to track thought processes clearly.
    4. Day 5: Switch media — try digital notation if you usually use paper, or vice versa, to see what’s most comfortable.
    5. Day 6–7: Consolidate your notation template and use it on a longer puzzle.

    Week 4 — Mixed practice and integration

    Goal: combine the previous weeks’ gains into varied practice that mirrors real play.

    1. Day 1: Short speed rounds (3 puzzles) using your chosen notation.
    2. Day 2: Pattern-focused puzzles applied with deliberate marks.
    3. Day 3: One long puzzle using all techniques: warm-up, pattern scanning, neat notation, calm pace.
    4. Day 4: Peer or social play option — solve with a friend or discuss strategies aloud.
    5. Day 5: Self-test — timed puzzle, then immediate reflection and two specific next-step goals.
    6. Day 6–7: Celebrate, review your month, and plan the next set of targets.

    Tracking and reflection

    Record tiny, consistent data: time spent, the puzzle type, one success, and one tweak for tomorrow. If you keep a dedicated notebook, follow a simple template: date, puzzle, minutes, wins, tweaks. For a minimalist approach try the logging progress method described in that guide—its short entries are a natural fit for this challenge.

    Adapting the plan

    Make the plan yours by adjusting intensity, duration, or puzzle types. If 10–20 minutes feels too short, extend core micro-tasks by 5–10 minutes. If you have limited time some days, do only the warm-up and reflection—still useful. Swap weeks in order if notation matters sooner, or repeat a week when you want extra reinforcement.

    Prompts for weekly reflection

    • What small change made the biggest difference this week?
    • Which puzzle steps still slow me down, and why?
    • What notation element felt redundant or unclear?
    • Which pattern do I recognize faster now than at the start?

    Final tips

    • Keep rituals tiny: consistent location, a short warm-up, and a one-line log dramatically increase follow-through.
    • Be kind to yourself: missed days are information, not failure. Reflect briefly and resume.
    • Rotate puzzle types to avoid plateauing—cross-training improves general puzzle sense.

    This monthly challenge is designed to be a calm, repeatable cycle you can return to every few months. After one month you’ll have a clearer sense of what helps your play, a small archive of logged notes, and comfortable routines to keep improving without stress.

  • Handy Notation Tricks for Solving Logic Grid and Deduction Puzzles

    Handy Notation Tricks for Solving Logic Grid and Deduction Puzzles

    Why notation matters

    Notation is the bridge between what you read on a puzzle and the deductions you make. Small, consistent marks outside of your main grid keep the grid tidy and the reasoning visible. Good notation reduces re-checking, prevents errors, and helps you calm the pace of your solving. When you learn to use notation to simplify tough puzzles, the hardest parts of a puzzle become easier to isolate.

    Core principles for any system

    • Be consistent: A mark should always mean the same thing. If a dot means “possible,” don’t flip it to mean “confirmed” later.
    • Prefer small, repeatable symbols: X, O, >, =, and numbers are quick to write and easy to scan.
    • Keep the main grid clean: Use the grid for firm assignments and eliminations; use margins and micro-maps for tentative notes.
    • Make conditional notes readable: Short, clear phrases or arrowed shorthand help later review (“If A–B, then C≠D”).

    Shorthand marks that save time

    Below are compact marks I use and recommend practicing. Choose one symbol for each meaning and stick with it.

    • Confirm: Solid dot or bold check (• or ✓) for a confirmed match.
    • Eliminate: Slash or small x (/) or x for impossible pairings.
    • Possible: Small open circle (o) or a light dot for a candidate.
    • Conditional: Use arrows for implications: “A → B” or in the margin “A→(B×)” to mean A implies B is false.
    • Pairing shorthand: Abbreviate long names in headers—use initials or 1–6 numbering—and keep a key at the top or side so you avoid rewriting full names.

    Micro-maps: a tiny separate workspace

    Micro-maps are small, separate sketches that track tentative relationships or multi-step chains. Think of them as sticky notes in the margins:

    • Draw a tiny 3×3 matrix to test a hypothesis (e.g., “If Alice=Red, then…”) and mark the resulting contradictions.
    • When a hypothesis leads to a contradiction, write a short note “Hyp A → contradiction” and mark the original hypothesis eliminated in the main grid.
    • Keep micro-maps deliberately temporary—cross them out when resolved to avoid clutter.

    Color cues without relying on color

    Color can be fast, but it isn’t always accessible or available. Combine simple color use with shapes and letters so your system still works in grayscale or for color-blind readers:

    • Use a single colored pen for confirmed items and a different pen for eliminations, but also add symbols (✓ and /) so meaning is clear without color.
    • If you label columns with colored initials, also include the initial letter or number inside the cell to avoid dependence on hue.

    Layout, margins and header abbreviations

    Good layout reduces searching time. A few layout rules I follow:

    • Reserve the top-left of the page for a short abbreviation key (e.g., A = Alice, R = Red).
    • Leave a wide right margin for micro-maps and conditional chains; this prevents overwriting grid cells.
    • Draw thin separator lines to group related columns or rows visually—these act as quick chunking cues for working memory.

    Before and after: a small example

    Imagine a 4×4 grid with people A–D and drinks Tea/Coffee/Juice/Water. Raw approach: write full names in each cell and cross out every elimination. The page gets messy and slows you down.

    After applying notation tricks:

    • Headers: A,B,C,D; drinks T,C,J,W with a short key at top.
    • Confirmations: mark A–T with • and write “A•T” in the margin.
    • Eliminations: use / in grid cells and keep possible candidates as small circles only in the margin micro-map for each person.
    • Conditional: when a clue implies “If C≠J then B=C,” write “C×J → B=C” in the right margin so the chain is visible without cluttering cells.

    Result: the grid shows only firm facts and eliminations; the margin contains the lightweight thinking steps that got you there.

    Short drills to practice notation

    Training the habit takes minutes. Try these five-minute drills:

    1. Set a one-clue challenge: draw a 3×3 grid, assign short headers, and spend three minutes listing every implication of that one clue in the margin using arrows and symbols only—no full sentences.
    2. Micro-map sprint: take a simple deduction puzzle or part of a larger puzzle and build a micro-map for one hypothesis. Stop after three minutes and decide: keep or eliminate the hypothesis.
    3. Cleanup drill: take a solved sample grid with heavy notes and spend four minutes converting it to a clean final grid—move tentative notes to the margin and mark confirmed items with a single symbol.

    These drills are ideal for short daily practice: the habit forms faster with repeated, focused attempts. If you want to practice notation in short sessions, repeat one drill per day for a week and review which shorthand stuck.

    When to go elaborate and when to stay simple

    Complex puzzles sometimes require more elaborate notation—multi-level micro-maps, numbered chains, or a second sheet for full hypothesis trees. For simpler puzzles, keep notation minimal so you don’t overthink. A useful rule of thumb: invest in more notation only if a hypothesis requires three or more linked deductions to resolve. See my note on how difficulty affects notation choices for a short guide to when to escalate your system.

    Final notes

    Notation should make solving calmer and clearer. Begin by adopting two or three symbols, a tiny margin micro-map habit, and a cleanup step at the end of each solve. Over weeks you’ll find which shorthand best matches your pace. The goal is not clever marks but fewer re-reads and steadier progress.

  • An Accessibility Checklist for Puzzle Designers and Players

    An Accessibility Checklist for Puzzle Designers and Players

    This puzzle accessibility checklist gives designers and players a compact, practical set of steps to make puzzles calmer and more welcoming. Use it as a working reference when you build or adapt a puzzle, or as a short routine of fixes you can apply before a session. The checklist focuses on visual contrast, input alternatives, timing and flexibility, cognitive load, and social-play considerations so that more people can enjoy relaxed puzzle play.

    How to use this checklist

    Read the whole list to get the full picture, then pick three concrete items you can implement this week. Players who need quick fixes can scan the “Quick fixes” section; designers should treat the full checklist as a lightweight spec to include during testing and documentation.

    Quick fixes players can apply now

    • High-contrast mode: Use browser or OS high-contrast settings or a simple stylesheet to increase text/background contrast for easier reading.
    • Increase font size and spacing: Zoom the page (Ctrl/⌘ +) and increase line-height in a reading extension to reduce crowding.
    • Keyboard-first input: Remap keys or use keyboard navigation if mouse control is difficult; many browser games respond to keyboard input already.
    • Reduce motion: Turn on “reduce motion” in your system preferences or use a site’s reduced-motion option to avoid animations that cause discomfort.
    • Use assistive tools: Try a screen reader, text-to-speech, or a color-blindness simulator to see what helps your experience. See a curated list of tools that improve accessibility.
    • Short sessions and save points: Break play into 10–20 minute blocks and keep a short note of where you stopped (a timestamp or a few keywords) so you can resume calmly.

    Designer checklist: practical items to include

    1. Visual clarity and contrast

      • Provide high-contrast themes and clear typography (large, legible fonts; adjustable sizes).
      • Avoid color alone to convey information — use shapes, patterns, or labels as well.
      • Test with color-blindness simulators and simple black-and-white rendering.
    2. Input flexibility

      • Support multiple input modes: mouse/touch, keyboard, and where practical, switch or voice input.
      • Make all interactive elements focusable and reachable by keyboard; provide clear focus outlines.
      • Allow remapping of controls or offer alternative simplified controls for menus and common actions.
    3. Timing and pacing

      • Design for adjustable or optional timers. Never force a strict countdown without an opt-out.
      • Offer pause and resume at any point; show a clear save/resume UI for longer puzzles.
      • Give undo and gentle error-tolerant mechanics instead of immediate elimination.
    4. Cognitive load and clarity

      • Present one core rule at a time and provide an optional quick-reference panel.
      • Include progressive hints that go from minimal nudges to more explicit guidance.
      • Break complex puzzles into labeled sub-tasks or stages to reduce working memory demands.
    5. Motion, animation, and sensory sensitivity

      • Limit flashing or rapid motion; provide a “reduced motion” option that turns off nonessential animation.
      • Control sound: allow volume control for feedback and an option to mute all nonessential audio.
    6. Layout, spacing, and readability

      • Keep interfaces uncluttered: clear margins, consistent alignment, and large hit targets for touch.
      • Use readable language, short sentences, and accessible copy for instructions and feedback.
    7. Social and cooperative play

      • Provide clear turn indicators and gentle turn timers; allow asynchronous play so players can participate at different paces.
      • Include privacy options and tools for players who prefer solo modes or private groups.
      • Design cooperative modes that minimize pressure: shared progress, optional help requests, and no public leaderboards by default.

    Testing and documentation

    Make accessibility checks part of your test routine. Have short QA tasks that validate contrast, keyboard navigation, screen-reader labels, and reduced-motion toggles. Document the available accessibility options in plain language and link readers to ways they can request adjustments or report issues.

    Accessibility-friendly practices for social puzzles

    For group or multiplayer puzzle formats, plan for calm interactions: let players opt out of live chat, offer slow-paced cooperative options, and make turn-taking explicit. If you run events or parties, share a brief accessibility guide with participants and offer small accommodations like extended turn windows or written instructions. For inspiration, see a few curated examples of low-stress multiplayer games that model these choices.

    Low-effort templates and formats

    Small templates help maintain accessibility without heavy redesign. Examples include a one-page “accessibility settings” modal, a printable 2-column quick-reference for rules, and a short checklist sent with puzzles that reads like an invitation: “Take your time — pause anytime; use the hint button once if stuck.” For journaling progress and accommodations, use a simple format such as date, puzzle name, pause point, and one sentence about difficulty; that compact approach works well across abilities and pairs neatly with easy journaling formats.

    Final notes

    This puzzle accessibility checklist is meant to be pragmatic: pick a few high-impact changes (text size, contrast, optional timers, and keyboard support) and treat accessibility as ongoing refinement rather than a one-time task. Designers who bake these options in early will reduce friction for players, and players who apply the quick fixes will find many games more comfortable and calming. If you want a short list of assistive tools and extensions to try, see our tools round-up at tools that improve accessibility.

  • Calm Multiplayer Puzzle Experiences: Cooperative and Low-Stress Competitive Games

    Calm Multiplayer Puzzle Experiences: Cooperative and Low-Stress Competitive Games

    Why choose cooperative and low-stress multiplayer puzzles?

    Multiplayer puzzle games can be social and stimulating without becoming high-conflict. When the aim is a relaxed evening of problem solving, the right game plus a short session routine makes all the difference. This guide outlines places to look for calm multiplayer experiences, how to configure modes and scoring, and quick session templates you can use with friends or family.

    What to look for in a calm multiplayer puzzle

    • Shared goals: Games that reward joint completion rather than individual high scores reduce competition pressure.
    • Low punitive mechanics: Avoid titles where mistakes lead to elimination or permanent setbacks; soft penalties (time delays, hints used) keep mood steady.
    • Explicit communication design: Asymmetric puzzles with clear channels for sharing information (text channels, shared boards) are easier to cooperate in.
    • Adjustable pacing: Turn timers, challenge levels, and optional hints let groups match the match speed to their mood.
    • Accessibility controls: Check for colorblind modes, scalable UI, text-to-speech or simplified input. See accessibility considerations to help pick the right settings before you play.

    Examples and short notes (local, online, mobile, and tabletop)

    • Asymmetric communication games: Keep Talking and Nobody Explodes — simple protocols, a calm pace if you remove timers and agree on a slow readout style.
    • Puzzle-adventure co-op: Portal 2 and the We Were Here series — level-based cooperation with room to pause and think between puzzles.
    • Local co-op puzzle platformers: Snipperclips (Nintendo Switch) — short levels, forgiving mechanics and an emphasis on cooperation rather than perfection.
    • Tabletop and card coop: Hanabi — cooperative card-play where teammates give limited clues; great for small groups and quiet sessions.
    • Word/party without harsh competition: Codenames in team mode — lightly competitive but low-pressure; teams can agree to remove scoring and play for speed or just for laughs.
    • Collaborative jigsaws and browser puzzles: Many jigsaw and whiteboard sites let multiple people work together on the same puzzle; pair with a voice call for a relaxed session.

    How to pick the right mode and difficulty for your group

    Match the game’s options to the group’s goals and energy. If you want gentle engagement, choose easier puzzles, turn off timers, and enable hints. If the group wants light challenge, select slightly harder puzzles but keep penalties soft.

    Use this quick checklist when choosing a mode: who is new, how much time do we have, do we want conversation or focused solving, and what level of failure is okay? For detailed guidance on matching mood and modes, see pick low-pressure game modes.

    Session structures that reduce stress

    Simple, repeatable structures keep play calm because players know what to expect. Try one of these 30–45 minute templates:

    Short Cooperative Session (30 minutes)

    1. 2–3 minute setup: agree on rules (no public criticism, one person reads aloud).
    2. 20–25 minutes: play continuous cooperative rounds — rotate the active role every level or every 10 minutes.
    3. 3–5 minute debrief: one positive thing, one small idea for next time.

    Casual Challenge Session (45 minutes)

    1. 5 minutes: calibrate difficulty and enable any accessibility options.
    2. 30 minutes: play with a shared pool of attempts (e.g., three mistakes allowed for the whole session) rather than per puzzle elimination.
    3. 5–10 minutes: review problem-solving approaches and swap roles.

    Low-conflict scoring and turn structures

    Scoring systems drive behavior. To keep things calm, prefer shared or contextual scoring:

    • Shared completion score: Everyone earns the same points for finishing a puzzle. This encourages help and avoids side-tracking attempts to self-maximise.
    • Time buckets: Group sessions are measured in broad time categories (fast, steady, relaxed) rather than precise leaderboards.
    • Role rotation: Take turns at the “active” role each puzzle or each level so everyone feels involved without one person carrying the pressure.
    • Penalty pools: Use a small communal penalty bank (three strikes for the group) rather than eliminating players.

    Tools and small tweaks that smooth cooperative play

    Use simple technical and social tools to reduce friction. A shared whiteboard or screen share prevents repeated verbal descriptions. Keep a short phrase list for communication (e.g., “pause”, “hint please”, “your turn”) to avoid escalating tones. For browser-based sessions, lightweight extensions or collaborative sites can help; see browser tools for cooperative play for recommended utilities and extensions.

    Set expectations and lead with calm

    Most conflict in multiplayer puzzle sessions comes from mismatched expectations. Start by naming the session’s goal: practice, unwind, or race. State whether scores matter and whether hints are available. Encourage a tone of curiosity: celebrate partial discoveries and treat dead ends as data, not failure.

    Closing notes

    Calm multiplayer puzzle play is about design choices as much as game selection. Favor shared objectives, forgiving mechanics, adjustable pacing, and a short session routine. With a few simple rules and the right settings, multiplayer puzzles can be a steady, social way to stretch your thinking without turning play into pressure.

  • A Minimalist Puzzle Journal: What to Track in 5 Lines per Day

    A Minimalist Puzzle Journal: What to Track in 5 Lines per Day

    Keeping a puzzle journal doesn’t need to be another long task on your to-do list. The goal of a minimalist journal is to preserve the benefits of reflection—tracking progress, spotting patterns, and reinforcing insights—without outweighing the pleasure of solving. This guide gives a one-page, five-line daily template you can use in a notebook or a notes app, examples to copy, and short review routines to make the journal meaningful.

    Why keep a tiny puzzle journal?

    A compact journal preserves the habit of reflection. When you capture one clear insight and a single metric each day, you build a data set that reveals trends (faster solves, recurring mistakes, preferred puzzle types) without needing long entries. It helps you make small, guided adjustments to your routine and gives you a low-friction way to remember techniques that worked.

    The 5-line daily template (one line = one short sentence)

    Each day, record five short items. Aim for one line each so the whole entry fits on a single row or a single note. Use abbreviations as needed.

    1. Time — how long you spent (e.g., 15m, 45m).
    2. Puzzle type — name or category (Crossword, Logic Grid, Nonogram, Daily Sudoku, Word Ladder).
    3. One insight — a single sentence: technique tried, mistake to avoid, or a small realization (e.g., “scan for singleton rows first”).
    4. One metric — a chosen difficulty or efficiency measure (see note below on which scale to use).
    5. Mood tag — one word that captures how it felt: calm, focused, frustrated, playful.

    Example line: 20m • Mini-Sudoku • Mark pencil candidates earlier • D4 • calm

    How to fill each line quickly

    • Time: use shorthand (m for minutes, h for hours). If you do several short puzzles, sum them or list as 3x10m.
    • Puzzle type: a 2–3 word label that you’ll recognize later.
    • One insight: force yourself to write only one sentence—this creates clarity and makes retrieval easy.
    • Metric: pick one simple scale and stick to it for trend analysis. For guidance on scales, see note puzzle difficulty.
    • Mood tag: keep a small list of tags (calm, focused, stuck, flow, amused) so entries are fast to choose.

    Two quick templates you can copy

    Printable (one row):

    DATE | TIME | TYPE | INSIGHT | METRIC | MOOD

    Digital (single-line note):

    2026-06-01 — 25m • Crossword • flag theme words first • D3 • focused

    If you use a simple note app, pin the monthly page and add a new line each day. If you use a notebook, reserve one page per month for quick scanning at the end of the period.

    Four short examples (realistic short entries)

    • 2026-03-05 — 15m • Wordle x2 • try vowel-first guesses • D2 • playful
    • 2026-03-06 — 40m • Logic Grid • mark contradictions immediately • D4 • focused
    • 2026-03-07 — 10m • Mini-Kakuro • re-evaluate row sums after fills • D3 • calm
    • 2026-03-08 — 30m • Daily Sudoku • pencil in all candidates once • D3 • flow

    Choosing the single metric to track

    Resist the urge to measure everything. Choose either a difficulty rating, a time efficiency metric, or a success rate and use it consistently. If you want help deciding which scale works for your session types, see note puzzle difficulty for practical options. Common choices:

    • Difficulty scale (D1–D5) for variety across puzzle types.
    • Time spent (minutes) for practice-focused days.
    • Percent complete or solved/attempted for goal-oriented weeks.

    Monthly review in 10–15 minutes

    At the end of each month, spend a short time scanning the page for patterns. Look for:

    • Repeated insights that can be turned into habits.
    • Shifts in average time or difficulty.
    • Frequent mood tags that tell you when puzzles felt most enjoyable.

    This minimalist approach pairs well with a month-long practice plan—if you follow a four-week challenge, your daily lines become the progress markers you need to track your 4-week progress. During the review, copy three notes to a fresh page: a habit to keep, a technique to practice next month, and one measurable target (e.g., reduce average time by 10%).

    Digital templates and quick automations

    If you prefer digital systems, keep the template in a notes app or a simple spreadsheet. Use a pre-filled template so adding a new line is one tap. For browser-based puzzle play, small browser extensions or note widgets can paste the current date and time into your template automatically. For a list of tools and suggested digital templates, see digital templates and tools.

    Accessibility and keeping it enjoyable

    Minimalist journaling is about keeping the entry cost tiny so you keep doing it. If writing is a barrier, record a 10–20 second voice memo that follows the five-line template and transcribe only monthly highlights. If small handwriting is a problem, use larger notebook lines or a simple digital form with big buttons.

    When to skip the journal

    If a session is purely recreational and you don’t want to break flow, skip the entry. The journal should help your practice, not become an obligation. A good rule: if you skip more than three sessions in a row, treat the next entry as a reset—write a single line noting why you paused and one small goal for getting back on track.

    Final notes

    A minimalist puzzle journal gives you the observational power of reflection with nearly no overhead. One clear insight per day, plus a consistent metric, produces useful data you can act on during a short monthly review. Use the five-line template in a notebook, a notes app, or a spreadsheet, and let the habit support calm, steady improvement.

  • Designing a Personal Puzzle Warm-up: Exercises to Improve Logical Thinking

    Designing a Personal Puzzle Warm-up: Exercises to Improve Logical Thinking

    Why a warm-up matters

    A five-minute warm-up before a puzzle session changes how you approach problems. It eases the transition from daily noise to focused thinking, primes pattern recognition, and gives you a quick feedback loop so you can adjust strategy before committing long effort. For calm, steady progress, a warm-up is not practice for speed; it’s practice for clarity.

    Design principles for short warm-ups (2–5 minutes)

    • Keep it bounded. Two to five minutes is enough to change your headspace without tiring you out.
    • Be specific to the puzzle type. Different puzzles exercise different skills: deduction, visual segmentation, or lexical search.
    • Practice one habit at a time. Use warm-ups to rehearse notation, pacing, or looking for certain patterns.
    • Make it repeatable. A small set of drills you can do daily builds steady gains.

    Warm-up drills by puzzle type

    Logic-grid puzzles (2–4 minutes)

    Focus: deduction flow and clean notation.

    1. Quick scan (30–45 seconds): read the scenario and write down the five key categories and one obvious elimination or match.
    2. Notation rehearsal (1–2 minutes): practice a small grid of 3×3 or 4×4 and apply one technique—fill all forced pairs, mark mutual exclusives, and draw any transitive connections. Treat this as a drill for your pen habits rather than solving the whole puzzle.
    3. One-chain check (30–60 seconds): create a short deduction chain from two clues: A→B and B→C, then confirm A→C on the grid. This trains you to spot chains during a real solve.

    While you rehearse notation, you can intentionally apply notation shortcuts like condensed marks and consistent symbols. Practicing these for two minutes makes them automatic when you start a full puzzle.

    Nonograms / Picross (2–5 minutes)

    Focus: visual segmentation and range marking.

    1. Line-scan drill (1–2 minutes): pick a small 10×10 or even 5×5 grid from a daily feed. Scan rows and columns and mark any guaranteed fills or empties using the line-overlap method.
    2. Edge-fill practice (30–60 seconds): choose the three longest runs and practice aligning them to both ends—this helps with initial anchor placements.
    3. Symmetry and block counting (30–60 seconds): glance for mirror patterns and count contiguous runs quickly to build pattern recognition.

    Word puzzles (crosswords, word searches, anagrams) (2–4 minutes)

    Focus: lexical access and flexible pattern thinking.

    1. Anagram sprint (60 seconds): take a five- or six-letter seed word and list as many words as you can that use those letters. Time-box it—don’t overthink.
    2. Crossword letter-filling (1–2 minutes): choose two short clues and fill them based on pattern and crossing letters—practice accepting initial guesses and then checking them.
    3. Word family warm-up (30–60 seconds): pick a common affix (re-, un-, -ing) and generate words. This primes morphological patterns helpful in tougher clues.

    Sample 5-minute routines

    Before a morning session (fast clarity)

    1. One-minute breathing and desk reset (clear distractions).
    2. Two-minute logic-grid notation drill (forced pairs and one-chain check).
    3. Two-minute anagram sprint (lexical quickness).

    Brief pre-puzzle reset (2–3 minutes)

    1. 30 seconds—scan the puzzle and set a simple goal (first three safe moves).
    2. 90 seconds—do one focused drill matching the puzzle type (line-scan for nonograms, notation rehearsal for grids, or anagram sprint for word games).

    These short routines also help you fit warm-ups into short sessions, especially when you plan to solve for only ten minutes at a stretch.

    Adapting drills to your level

    • Beginner: Keep drills highly guided. For logic grids, use 3×3 practice sheets and verbalize each step as you mark the grid. Count aloud for nonogram runs. For word puzzles, allow clue lookup after an honest attempt.
    • Intermediate: Increase complexity—4×4 grids, 10×10 nonograms, longer anagram seeds—and reduce explicit prompting. Add a one-minute speed constraint to build fluency.
    • Advanced: Use targeted micro-challenges: find a subtle chain in a logic grid without writing everything down, resolve a single ambiguous nonogram block, or produce an uncommon anagram. Focus on precision over speed.

    How warm-ups reduce frustration

    Warm-ups lower the initial friction of a puzzle in three ways:

    • Reduce decision cost: Rehearsing a first move or notation reduces the time you spend deciding how to start.
    • Reset emotional baseline: A brief, successful drill gives you a small win that quiets impatience before tackling harder sections.
    • Improve recovery tactics: If you hit a wall during a puzzle, switch to a one- to two-minute warm-up drill as a paced break—this is an active reset that prevents escalating frustration and preserves calm problem solving. See also calm techniques for tough puzzles for longer recovery methods.

    Make it habitual

    Start with a week of identical warm-ups so the routine becomes automatic. Track just the habit—open your puzzle app or notebook, do the two-to-five minute warm-up, then solve. After two to three weeks you’ll notice smoother starts, fewer careless errors, and a steadier sense of control.

    Final checklist: building your personal warm-up

    1. Choose one drill per puzzle type that takes under five minutes.
    2. Decide a time block: 2 minutes (quick reset) or 5 minutes (full readiness).
    3. Pick one habit to practice in that drill (notation, edge fills, anagrams).
    4. Repeat the same routine for a week, then tweak complexity.

    Warm-ups are small investments with consistent returns: clearer thinking, fewer mistakes, and calmer solving. Design a few compact drills, rehearse them, and let the routine guide you into better, more relaxed puzzle play.

  • Micro-Puzzle Sessions: 10-Minute Routines to Reset Your Mind

    Micro-Puzzle Sessions: 10-Minute Routines to Reset Your Mind

    Short, structured puzzle time can be a gentle way to reset during a busy day. This article lays out a dependable 10 minute puzzle routine you can use anywhere: three micro-sessions (a word-game sprint, a logic sketch, and a pattern quick-check), guidance for choosing puzzles that reliably fit the timebox, and a simple weekly schedule to keep momentum without stress.

    Why a 10-minute puzzle routine works

    Ten minutes is long enough to engage your attention and short enough to be friction-free. The constraint helps you focus on process over perfect solutions, and the predictable frame makes it easier to repeat daily. Treat the session as a small reset: clear focus for a fixed time, then return to your day refreshed.

    Start with two-minute warm-ups

    Begin each micro-session with a focused two-minute warm-up to shift your attention and loosen thinking. Try a single quick exercise—finger tracing a small pattern, a rapid anagram scramble, or a few arithmetic fact checks—to move your brain into puzzle mode. For more warm-up options, see two-minute warm-up exercises.

    Three micro-routines (each ~10 minutes)

    1) Word-game sprint (10 minutes)

    • What you need: a short word-game app, a printed mini-crossword, or a set of five anagram prompts.
    • How to run it:
      1. 00:00–02:00 — warm-up (simple three-letter anagrams or vowel-consonant drills).
      2. 02:00–08:00 — focused play on one puzzle type (e.g., attempt the mini-crossword or solve as many short anagrams as you can).
      3. 08:00–10:00 — review: note one strategy that helped or a word you learned.
    • Why it works: Word tasks support quick wins and vocabulary stretching without heavy cognitive load. Keep the format consistent so you can measure progress over weeks.

    2) Logic sketch (10 minutes)

    • What you need: paper and pen (or a notes app), and one small logic puzzle (5–8 clues, e.g., a short grid puzzle or a single binary-deduction problem).
    • How to run it:
      1. 00:00–02:00 — warm-up (a two-minute pattern recognition or rule-check task).
      2. 02:00–07:00 — sketch the puzzle visually: mark constraints, make a small grid, and test one hypothesis.
      3. 07:00–10:00 — consolidate: record one insight and either finish the puzzle quickly or label it for later revisit.
    • Why it works: The sketching step externalizes possibilities so you spend less time holding options in memory. This is especially useful when you only have a short slot.

    3) Pattern quick-check (10 minutes)

    • What you need: tactile or visual patterns: small Sudoku variants, sequence puzzles, or a set of five visual logic tiles.
    • How to run it:
      1. 00:00–02:00 — warm-up: scan a grid for obvious fills or symmetry cues.
      2. 02:00–08:00 — rapid passes: fill what you can with simple rules, avoid deep branching.
      3. 08:00–10:00 — stop and annotate: highlight the next two most promising moves for a future session.
    • Why it works: Pattern checks train quick recognition and let you make measurable steps in a small window. Annotating next moves keeps continuity between sessions.

    Choosing puzzles that fit 10 minutes

    Not every puzzle suits a micro-session. Favor tasks with clear, repeatable structures and limited branching so you won’t hit a frustrating dead end. For a practical method to judge puzzles by expected time and complexity, see choosing suitable micro-puzzles. In general:

    • Prefer compact puzzles with 1–3 decision points you can evaluate in a minute or two.
    • Use puzzle sets (five mini-crosswords, ten anagrams) so you can decide when you’ve spent your time.
    • Keep a small stash of short puzzles on your phone or printed cards to avoid search friction.

    Keep it light: a quick puzzle journal

    Logging a mini-session makes the habit stick without adding overhead. Record date, routine type, one short note (what you tried), and a single observation about enjoyment or a technique to repeat. For a ready-made template, see quick puzzle journal.

    Sample weekly schedule (compact and repeatable)

    Rotate the three micro-routines so each gets focus while keeping variety daily. This sample assumes one 10-minute session per weekday and a slightly longer weekend practice.

    1. Monday — Word-game sprint (vocab and quick wins)
    2. Tuesday — Logic sketch (structured thinking, pen-and-paper)
    3. Wednesday — Pattern quick-check (visual rules)
    4. Thursday — Word-game sprint (try a different format)
    5. Friday — Logic sketch (review a puzzle left open earlier)
    6. Saturday — 20-minute combined session: pick two micro-routines back-to-back.
    7. Sunday — Rest or review journal entries and plan the coming week.

    If you like a monthly structure, this approach fits neatly into a longer plan; see the four-week micro-session plan for a simple progression.

    Practical tips for consistency

    • Set a visible timer for exactly ten minutes to keep the session honest and finite.
    • Keep your puzzle tools ready in one place (app folder, printed cards, or a small notebook).
    • Treat sessions as non-competitive practice—focus on a tiny improvement or a pleasant moment rather than completion.
    • If a puzzle exceeds the timebox, mark the spot and move on; you can schedule a longer follow-up later.

    Micro-sessions are about steady, low-friction engagement. This 10 minute puzzle routine helps you refresh your attention, build small habits, and enjoy puzzles without commitment. Start with a two-minute warm-up, pick one focused routine each day, and use a quick journal note to close the loop. Over weeks, those small resets add up into calmer, more confident play.